Replacing a bathtub faucet valve is an essential skill for any homeowner or DIY enthusiast.
A malfunctioning or outdated valve can lead to issues such as leaks, low water pressure, or difficulty in temperature control.
By following a few simple steps and with the right tools, you can replace the bathtub faucet valve yourself and restore the functionality of your bathtub.
In this article, we will guide you through the process, from preparation to testing the new valve, ensuring a successful replacement.
Tools and Materials Needed
Before starting the replacement process, gather the following tools and materials:
- Adjustable wrench
- Screwdriver (Phillips and flathead)
- Allen wrench
- Pipe wrench
- Plumber’s tape
- Replacement valve
Ensure that you have these items readily available to facilitate a smooth and efficient replacement process.
Preparing for the Replacement
Before you begin replacing the bathtub faucet valve, take the following preparatory steps:
- Shut off the water supply: Locate the main water shut-off valve for your home and turn it off to prevent any water flow to the bathtub.
- Drain the remaining water: Open the bathtub faucet to drain any remaining water in the pipes. This step will help minimize water spillage during the replacement.
- Remove any decorative covers: Some bathtub faucets have decorative covers that conceal screws or mounting hardware. Carefully remove these covers to access the underlying components.
Removing the Old Bathtub Faucet Valve
To remove the old bathtub faucet valve, follow these steps:
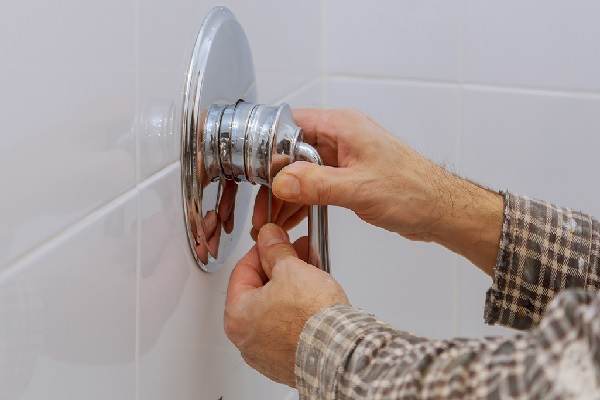
- Remove the handle: Depending on the type of handle, you may need to unscrew it or use an Allen wrench to detach it from the valve stem.
- Detach the escutcheon plate: The escutcheon plate is the decorative cover behind the handle. Unscrew it or use a flathead screwdriver to remove it from the wall.
- Unscrew the valve stem: Locate the valve stem and use an appropriate wrench to unscrew it counterclockwise. Apply steady pressure to loosen and remove the old valve.
Selecting the Right Replacement Valve
Before purchasing a replacement valve, it is essential to understand the different types available and select one compatible with your bathtub.
Common types include compression valves, ball valves, cartridge valves, and ceramic disc valves. Consider the age and design of your existing faucet to ensure a proper fit.
Research and consult with a professional if needed to identify the most suitable replacement valve for your specific bathtub.
Installing the New Bathtub Faucet Valve
With the old valve removed, you can now install the new one:
- Prepare the valve for installation: Apply the plumber’s tape to the threaded connections of the new valve. This will create a watertight seal when installed.
- Insert the new valve stem: Align the new valve stem with the mounting hole and carefully insert it. Turn it clockwise to secure it in place.
- Secure the valve and reattach the handle: Use an appropriate wrench to tighten the valve securely. Then, reattach the handle by following the reverse steps of its removal.
Testing the New Bathtub Faucet Valve
After installing the new valve, it is crucial to test its functionality:
- Turn on the water supply: Slowly open the main water shut-off valve to allow water to flow to the bathtub.
- Check for leaks and proper functionality: Turn on the faucet and observe for any leaks around the valve or handle. Test both hot and cold water, ensuring smooth control and accurate temperature adjustment.
If you notice any leaks or issues, revisit the installation steps and make any necessary adjustments. If the problems persist, consider seeking professional assistance to ensure a proper installation.
Troubleshooting Tips
During the replacement process, you may encounter certain issues or challenges. Here are a few troubleshooting tips to help you overcome common obstacles:
- If the valve stem is difficult to remove, apply penetrating oil to loosen it and make removal easier.
- Use a pipe wrench for extra leverage when unscrewing stubborn valve stems.
- If the new valve leaks after installation, double-check that the connections are tight and use additional plumber’s tape if necessary.
- If you face any difficulties during the process, consult online tutorials or consider seeking professional assistance to avoid any further damage.
Maintenance and Care
To ensure the longevity and proper functioning of your bathtub faucet valve, it is essential to perform regular maintenance and follow preventive measures. Consider the following tips:
- Periodically inspect the valve for any signs of wear or damage, such as leaks or loose connections.
- Clean the valve and surrounding area regularly to prevent the buildup of grime or mineral deposits.
- Avoid using excessive force when operating the handle, as it may lead to premature wear of the valve components.
- If you notice any recurring issues or concerns, contact a professional plumber for a thorough inspection and necessary repairs.
By adopting these maintenance practices, you can extend the lifespan of your bathtub faucet valve and enjoy a trouble-free bathing experience.
Conclusion
Replacing a bathtub faucet valve is a manageable DIY project that can save you time and money.
By following the step-by-step instructions provided in this article, you can successfully replace the old valve and restore the functionality of your bathtub.
Remember to gather the necessary tools and materials, prepare the area, and select a compatible replacement valve. Test the new valve for leaks and proper functionality, and troubleshoot any issues that may arise.
With regular maintenance and care, your new bathtub faucet valve will provide years of reliable service.


