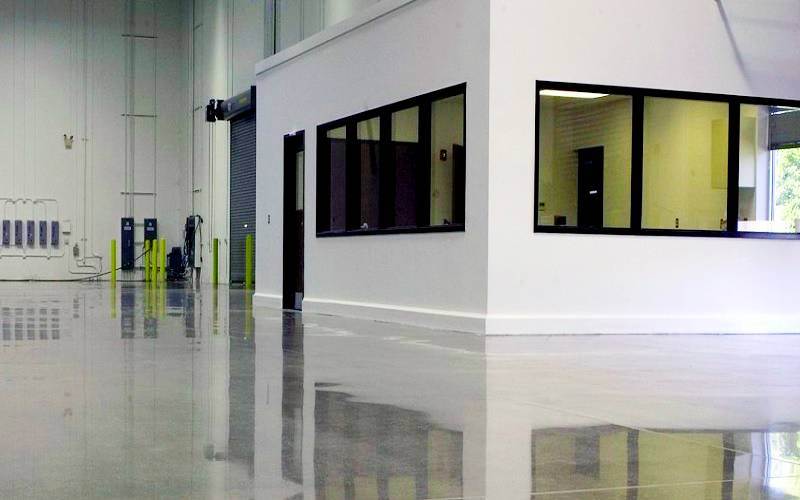
With benefits like high durability, moisture resistance, cost-efficiency, and ease of maintenance, polished concrete is one of the most famous flooring types today.
Interior fit-out companies in Dubai consider this flooring material the best choice for high-traffic areas, especially on production floors and communal spaces in commercial and industrial buildings.
Curious about how polished concrete floors are made? This article covers the seven steps needed to install this type of floor.
How Polished Concrete Floors are Made
Step #1: Cleaning
Polished concrete floors come from already existing concrete surfaces. Some may be relatively new and built to be polished, but others have already stood the test of time.
Whatever the case, the first step in transforming a concrete floor into a gorgeous polished surface is cleaning.
During this process, experts remove any adhesive material attached to the floor, including glue, tack strips, and mastic. They also eliminate the sealers and other coatings that may have been applied to the surface.
In many cases, professionals can easily remove the adhesive residue via mechanical means. However, some substances may adhere to the surface too much, making chemical removal necessary.
After this, the floor is mopped and dusted before it is deemed ready for the next step.
Step #2: Repair
The primary advantage of cleaning the surface to be polished is that experts can easily spot any damage on the floor during an inspection. Once they know the exact condition of the concrete, they can already move on to the second step: repair.
During this stage, workers patch the chipped concrete and remove any protruding metal from its frame. They also fill in the cracks to ensure a smooth finish and improve the durability of the polished floor.
Any crack that measures 0.25 inches (0.64 centimeters) and below is filled using a caulk gun, while wider fissures are patched up with vinyl concrete.
Step #3: Hardness Test
Concrete floor polishing requires floor grinding services to smooth out the rough surface. But before proceeding to the main task, these professionals must first perform a hardness test.
Using MOHS hardness picks, they check the concrete hardness to determine the right type of grinder to use. Here’s how this is normally done:
- After selecting a sample area on the concrete floor, they draw a two-inch (5.1-centimeter) pencil line on the surface using a #9 pick that looks like a pencil.
- They look and feel for a scratch and move on to the next pick, working their way down the numbers until they reach one that doesn’t leave any marking on the surface.
The MOHS hardness test result determines how hard the surface is and ultimately supports an accurate selection of bonds for the task. The softer the concrete, the harder the bond it needs.
Step #4: Grinding
Grinding is similar to sanding, except the former is done on concrete instead of wood.
When it’s time to start this step, professional grinders pick out discs to use on the surface based on the result of the MOHS testing.
Then, using diamond tooling with grit sizes that look a lot like sandpaper, they start smoothing out the floor’s surface.
For this process, experts use a 30- to 40-grit diamond, moving up gradually, before taking another pass using an 80-grit diamond. After that, they switch to 150-grit or higher, depending on the desired outcome.
The higher the grit number, the shinier the finish.
Step #5: Hardening
Once the grinding is completed, the smooth surface of the polished concrete floor will start to emerge. However, the process doesn’t end there.
For the fifth step, professionals perform chemical densification – also known as hardening – to optimize the performance and appearance of the polished concrete floor.
They apply a densifier according to the product manufacturer’s instructions. However, most liquid hardener products only need to be sprayed onto the newly buffed surface, leaving the concrete less permeable and preventing powdery dust from forming on its surface.
Step #6: Polishing
Polishing is done using the same concrete grinder used for step no. 5, except with a higher-grit attachment.
In most cases, floor polishing experts begin with a 100-grit diamond tooling, moving up to 800- or 1500-grit, depending on the desired results.
Step #7: Sealing
Sealing is one of the most critical steps in polishing concrete because it protects the surface against dirt, grease, and other stains. Sealers with a glossy quality also leave the floor shinier, looking better than ever.
Experts choose between two types of concrete sealers: water-based products or solvent-based sealers.
Moreover, sealers are applied in different ways, depending on the manufacturer’s instructions. Some recommend rolling a thin coat of the product onto the surface using a paint pan and paint roller, while others suggest spraying it directly for a light and even coating.
Take note that this step must be performed during dry conditions. The air temperature must also remain above 50 degrees Fahrenheit (10 degrees Celsius) for the next 24 hours after sealant application.
Sealing is also repeated to apply a second coat. This can be done after two to four hours, depending on whether the surface still feels tacky.
Let Your Floor Shine
Polished concrete floors offer durability, cost-efficiency, and ease of maintenance. Let your floor shine with this aesthetically pleasing and practical solution to your old, beat-up concrete floors.


