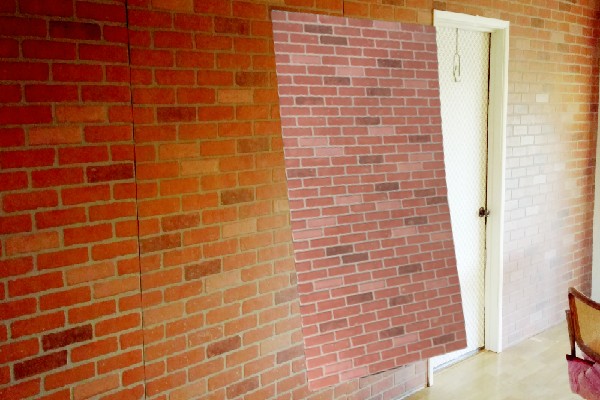
If you have been looking to give your kitchen or bathroom an industrial look, consider adding faux brick panels to the walls.
It’s an easy DIY project that can take as little as 30 minutes if you are working alone and know what you’re doing but don’t worry, we’ll walk you through it! This project may seem challenging at first glance.
But it’s not very difficult once you get the hang of it and once you see how great it looks, we think you’ll be inspired to try even more home improvement projects on your own!
Before you start
Make sure you’re working with drywall (not plaster).
If you live in an older home, there’s a chance that it’s actually plaster and not drywall. Plaster walls require specific prep before you can hang anything onto them.
Faux brick panels are easy to install on drywall, so check first! If your walls are plaster, contact a professional for help.
Otherwise, read on Even if you’ve never installed any kind of wall art before, installing faux brick panels is a breeze.
Read through these tips from our experts and then get started the installation will be complete within 30 minutes or less!
If desired, use a pencil to draw guidelines along where your panel will go horizontally across your wall; aligning it perfectly is essential to making these wood-look panels look great.
Choose your design
iinexpensive decorative wall paneling comes in a variety of patterns and designs, so it’s easy to make your home look like you spent more money than you actually did.
Consider some other DIY projects before installing your decorative wall paneling prepping your walls may save you time later.
Before tacking that brick wall look onto your walls, prime and paint them first using a good primer will ensure better coverage and stronger adhesion.
It might also be wise to fill any holes or cracks in your existing walls with an adhesive made for patching uneven surfaces.
This way, when you stick those decorative panels up on your wall they’ll look even nicer! The appearance of a seamless surface is always more attractive than an uneven one!
Prepare your wall
If you have a section of the wall that you want to cover with decorative bricks, be sure it’s clean and free of dust, dirt, and oil.
Use a cloth or sponge dipped in warm water and mild detergent. Rinse with clear water. Let dry completely before proceeding.
If necessary, apply primer using an inexpensive foam brush. We recommend using 2 coats of primer for best results. Allow each coat to dry thoroughly before applying another coat.
Apply adhesive: Remove one strip of tape from each panel and adhere them to your wall to make sure they overlap slightly.
Make sure there are no air bubbles between your brick paneling and your wall surface.
Secure paneling: Peel off both strips of tape from each individual brick panel, and press firmly against your prepared wall surface, ensuring good contact all around each individual piece.
Follow manufacturer instructions
Most decorative wall panel manufacturers, including Creations by Crayons, have an instructional video that walks you through how to install their product.
Watch it once or twice before starting and make sure you have all of your tools ready: a hammer or rubber mallet, flat-head screwdriver, sharp utility knife (also called a razor knife), pencil and tape measure.
Our project video below shows us installing panels for countertops in a kitchen island area because they’ll be mounted over appliances and cabinets that get hot, we used construction adhesive instead of tape strips.
To learn more about choosing whether tape or adhesive is right for your project, visit our Installing Faux Brick Panels product page.
Trim your design if necessary
If you’re covering a large wall area, you’ll need several panels.
If your panel dimensions are too large for your space, use a utility knife and straightedge ruler to trim each panel down to size.
As long as you stay along your cutting line, you shouldn’t have any problems after applying fresh adhesive tape. Use a level if necessary for accuracy!
Attach your new brick panels
It’s a good idea to practice installing your new panels in an out-of-the-way area, like behind a door or under a kitchen cabinet.
That way, you can work out any installation issues before tackling your main project.
Keep in mind that many interior designers and home improvement experts suggest attaching your wall paneling with nails; if you choose to do so, be sure not to use too long of a nail or too big of a hammer.
Otherwise, you could end up piercing through one of your decorative panels.


