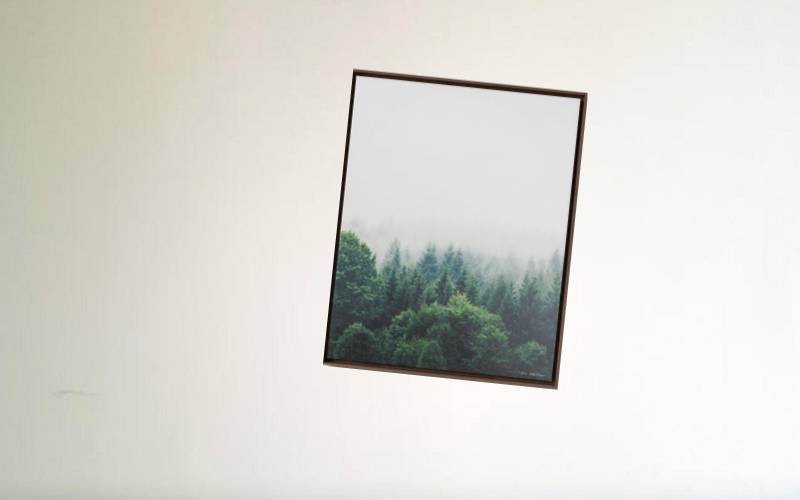
A slightly crooked painting on the wall can be a bit of a nuisance, but it’s not impossible to fix. It’s not a big deal, but it’s definitely noticeable.
So what do you do? The first thing you should do is try to fix it yourself. If that doesn’t work, then you can always call a professional. But before you do that, here are some tips on how to fix a slightly crooked painting on the wall.
How to fix a slightly crooked painting on the wall?
Step 1: Take measurements and make marks
In order to get the painting level and straight, you must first take some measurements. This will help determine the width and height.
Next, mark the wall down the center of each side with a pencil so you can easily connect the marks when leveling them. Make sure your measurements are accurate before you start customizing!
Step 2: Remove the painting from the wall
You will need a ladder to reach the painting. Once you have it, carefully remove the painting from the wall making sure not to damage it in any way.
You then have to assess how crooked the image is and decide which method works best for you: use an e-leveler or adjust the frame manually. Either option can take around 30 minutes depending on how slanted your paint job is.
Step 3: Adjust the painting and put it back on the wall
When it comes to hanging a painting, it is always important to consider the size of the canvas or frame. After that, you need to adjust the painting so that it fits perfectly on the wall.
Start by removing the painting from its original location and placing it on a flat surface.
Use your hands to gently smooth out any wrinkles in the canvas or frame. Once you are happy with how it looks, mount it back on the wall using small nails or tacks as needed.
Step 4: Hang the painting using screws or nails
When it comes to re-hanging paintings, there are a few things to keep in mind. First, if the painting is small, you can use adhesive putty to fix it. Second, for larger paintings, you will need to use screws or nails.
Make sure the screws or nails are not too long or they can penetrate the wall. Finally, using a level when hanging your painting will ensure it stays straight and looks neat when displayed.
Step 5: Hang the Painting Back on the Wall
Congratulations on completing your successful content marketing campaign! Now is the time to take a step back and admire your work.
Make sure you use the proper hanging hardware and technique so that the painting lays flat. It’s important to make sure that the painting looks its best, no matter how crooked it is!
Once everything is ready, step back and enjoy your newly hung masterpiece. Remember – content marketing isn’t easy, but with a little effort, anything is possible!
Read Also:
25 Wall Painting Ideas to Transform Your Space
Step 6: Stand Back and Admire Your Handiwork!
Congratulations on successfully completing your content marketing strategy! After all the hard work, it’s nice to take a step back and admire your handiwork.
If you are happy with how it looks, then congratulations – you have achieved success! If not, though, don’t be afraid to tweak things until you’re happy with the final product.
There’s no guarantee that everything will go according to plan from start to finish, but sticking to the plan will help minimize the chances of failure.
Things to keep in mind
A painting that’s a little crooked can be a bit of a nuisance, but it’s not impossible to fix. The first step is to take a step back and reassess the painting as a whole.
If it’s only slightly off-kilter, you can try to straighten it by gently pushing on the frame in the correct direction.
If the painting is more than just slightly off-kilter, you’ll likely need to reposition the entire frame itself. Be extra careful not to damage the wall or paint job while making any adjustments.
Have patience and take your time, and you’ll be able to fix that crooked painting in no time!
What materials in need to repair a slightly crooked painting?
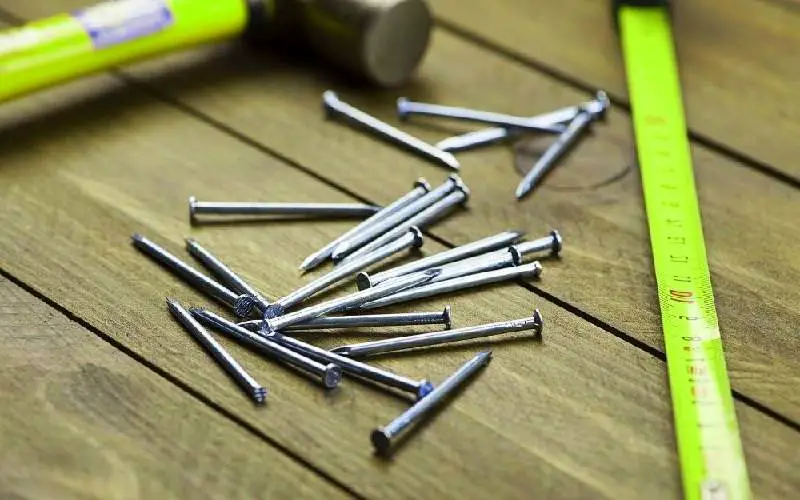
A hammer
A hammer is an essential tool in the home when it comes to repairing or renovating items.
It can be used to straighten out nails or screws, and can also be used to push paintings back into place if there are any gaps between them and the wall.
If necessary, you can use putty or spackle to fill in the gaps.
Nails or screws
When it comes to hanging a painting, the most common option is to use nails or screws.
Nails are perfect for small paintings and can be hammered in easily without having to worry about mistakes.
For bigger paintings, screws are the better option as they have greater holding power and will not come loose over time.
Make sure to put the screws in the wall studs for extra support. Finally, use a level before hammering them in so that your painting is straight from start to finish!
Wall putty or spackle
If you’re ever faced with the dilemma of fixing a slightly crooked painting on the wall, wall putty or spackle will be your ideal solution.
Wall putty or spackle is a solid, temporary fix that can be easily applied and removed without any damage to the paint.
To use wall putty or spackle, first make sure that the area you’re going to apply it to is clean and free from dust, dirt, or other residue. Then use a putty knife to spread the material evenly over the back of the painting.
Make sure it’s level before letting it dry – this will help ensure that your painting comes out straight after application!
Once dry, sand down any rough edges if necessary (it’s usually not necessary). Repaint as needed and your problem should be solved!
Paintable caulk
Paintable caulk is a great way to protect the surface of your paintings from water damage and drafts. Here are the steps you need to take to get the best results:
- Choose the type of paintable caulk that suits your needs. There are two main types – solvent-based and water-based.
- Apply the caulk using a putty knife, making sure to smooth out any irregularities first.
- Use a wet rag to remove any excess debris, then dry off the surface with a dry cloth before coating it again if necessary
A paintbrush
A paintbrush is an essential tool for any painter. It can be used to fix a slightly crooked painting or even repaint entire walls if necessary.
The type of brush you need will depend on the size and shape of the painting regular, roller, or special brushes with bristles that are specially designed for this kind of work.
Once you have the right brush, simply dip it in paint and start brushing over the areas that need fixing. Remember to use light strokes so as not to cover up the original artwork!
A measuring tape or ruler
There are many reasons why a painting on the wall could not be perfectly straight. Perhaps the frame is crooked or the wall doesn’t have a level surface.
In these cases, it can be difficult to get the painting into position in its frame and keep it there.
One way to try and solve this problem is by using a measuring tool – such as a tape measure or ruler – to find the center of the painting.
Once you know where that is, you can use that information to help straighten out the picture on your wall.
If still, things aren’t looking good, you might want to try using some adhesive strips on the back of your frameless art piece’s frame so that it remains in place while being framed.


