Whether your house is getting old or you’d like to change its appearance, repainting your home would always be a great idea. This is a budget-friendly way to boost your home’s mood instantly. However, if you plan on painting multiple rooms in your home, expect to face extra challenges, as this would never be a walk in the park.
Repainting several rooms in your home gives you a fresh start. It’s an excellent way to improve your home’s appearance. But painting a room is more than purchasing paint and getting your hands dirty. To ensure the success of this project, you need to take additional steps. That said, here are some dos and don’ts to keep in mind as you prepare to paint multiple rooms in your home:
Do: Get A Sample Paint First

Buying a bucket of paint can be expensive. It’ll be extremely frustrating to spend a lot of money on paint only to find that the colors seem different in your home than they did at the store because of the lighting. This can be incredibly challenging if you haven’t settled on a paint color for the room, as the choice between Aura vs. Regal paints for your space can feel endless. To save you from the trouble and unwanted expense, you should get a paint sample first.
To get a sample paint, you can ask the store if you could take a sample on a piece of wood and bring it home to see how it’ll look inside your home. This sample size would typically be placed in a 4×4 inch wood to look at how the paint will look against your wall.
Don’t: Rush The Process
Painting multiple rooms can be overwhelming, especially considering how many rooms you need to paint. Remember that painting a room can be a lengthy process, which you need to prepare for. With this, you shouldn’t rush the process and let everything flow naturally. Rushing the painting project might result in poor output, affecting its appearance or how long the paint lasts.
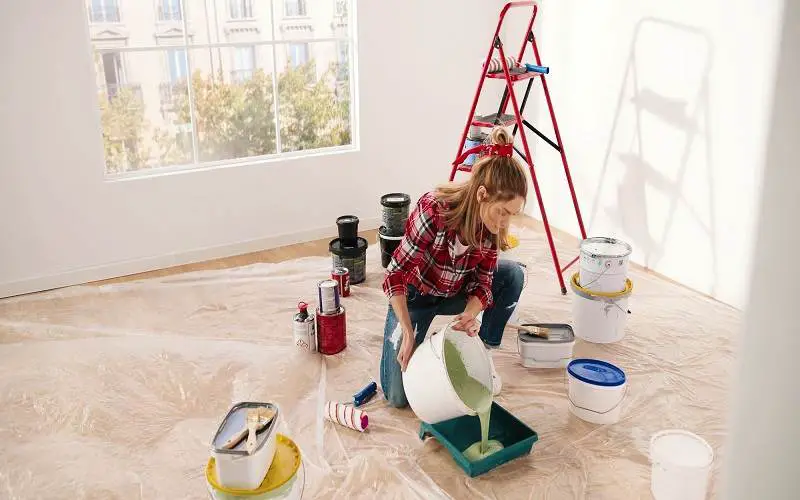
Do: Prepare Each Room
Before you bring out your paintbrushes and paint, you should begin by preparing each room for the project. You should remove every piece of furniture inside the room and try to keep it empty as much as possible. If you don’t have enough place to store them, you can push them to the center of the room and cover them with painter’s drop cloth to prevent catching spills and paint.
Newspaper can easily tear apart, putting your home at risk of spillage. Therefore, it’s best to use a huge plastic sheet to cover the entire floor. Moreover, you should also cover your outlet and edges using painter’s tape to keep the paint from penetrating.
Don’t: Paint Immediately
In line with rushing your work, you shouldn’t paint your walls immediately without preparing your walls. Aside from protecting what’s inside your room, you should avoid applying a fresh coat of paint on your bare walls without preparing them for the process.
While it might seem easier to paint immediately, doing so can shorten the life of your paint and lead to an uneven finish. Ideally, you should remove the initial paint from your walls and fill in any gaps or holes. Remove any wallpaper, clean your walls, and apply a primer. Although it may slow you down, preparing your walls properly will ensure that your paint job lasts for years.
Do: Calculate How Much Paint You’ll Need
Once you’ve settled on the Regal or Aura paint color and finish for each room, you’ll need to calculate how much paint you’ll need to buy. Buying too much might waste your money while buying too little can affect the overall output of your room. To purchase the right amount of paint, you need to identify the exact surface area of the room. You can rely on the container’s recommendation and see how much a bucket can accommodate.
In most cases, a gallon can cover up to 400 square feet. This is typically enough for an entire small bathroom. You can add more buckets depending on your room size. You also need to consider if you’re planning to have an accent wall, as this would require at least a gallon of paint.
Don’t: Bring Furniture Back Immediately
After painting your entire room, it might be tempting to bring everything back to visualize what your space could look like after the update. However, it would be best to wait for at least 24 to 48 hours before the paint completely dries before bringing the furniture back into the room. This helps to avoid any possible damages or scratches on the paint as you’ve allowed it to dry completely.
Do: Promote Proper Ventilation
Painting can really be suffocating, especially without the proper tools. If you don’t have a respirator, you must provide adequate ventilation when painting your room. This will allow you to breathe easier and avoid suffocating on any lingering odors.
You can do this by opening all doors and windows during the entire project. After you’ve finished painting a room, leave all the doors and windows open to let the paint fumes dissipate. You may close the windows at night for safety but keep your indoor doors open.
Don’t: Keep Kids And Pets In The Same Room
Since painting emits foul and toxic fumes, it’s best to keep children and pets away from the room. They shouldn’t enter the room unless the harmful odor fades away, even if the paint completely dries. If you plan to paint the entire house, it’s best to temporarily relocate them. Since they may be put at risk if they are exposed to paint chemicals.
Do: Clean Your Working Space
When your workspace is orderly, cleaning up won’t be a hassle. It can also help to protect other parts of your home that you don’t wish to add paint to. To keep everything organized, you should have a workbench wherein you can store your paints and tools. And don’t forget to add recycled paper or plastic on the surface of your workbench to catch any spills. Since this’ll be more than a one-day job, you need to learn how to cover your paint bucket properly so that the lid doesn’t harden and prevent you from opening it the following day.
Takeaway
Learning the do’s and don’ts of painting multiple rooms in your home allows for a more successful project. While it might require you to exert more effort in the process, it’ll surely help to guarantee a successful result and allow your room to look beautiful, clean, and well-polished.


